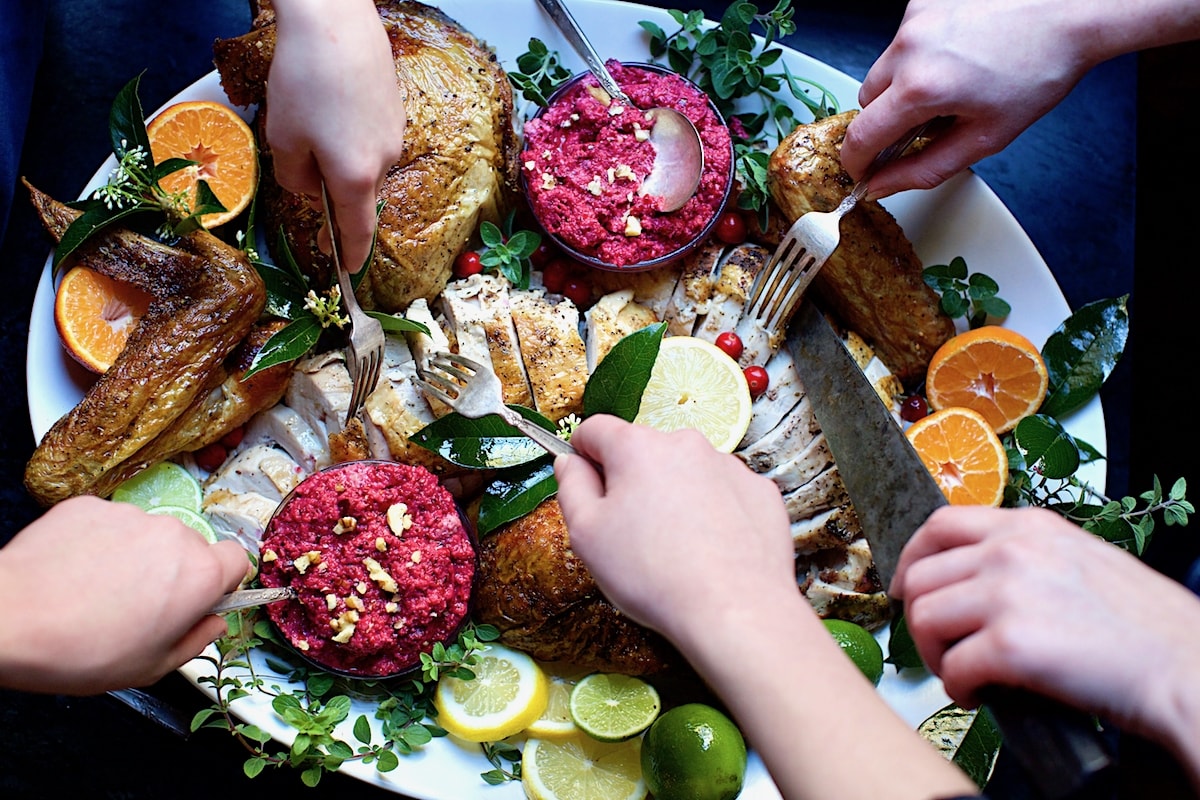
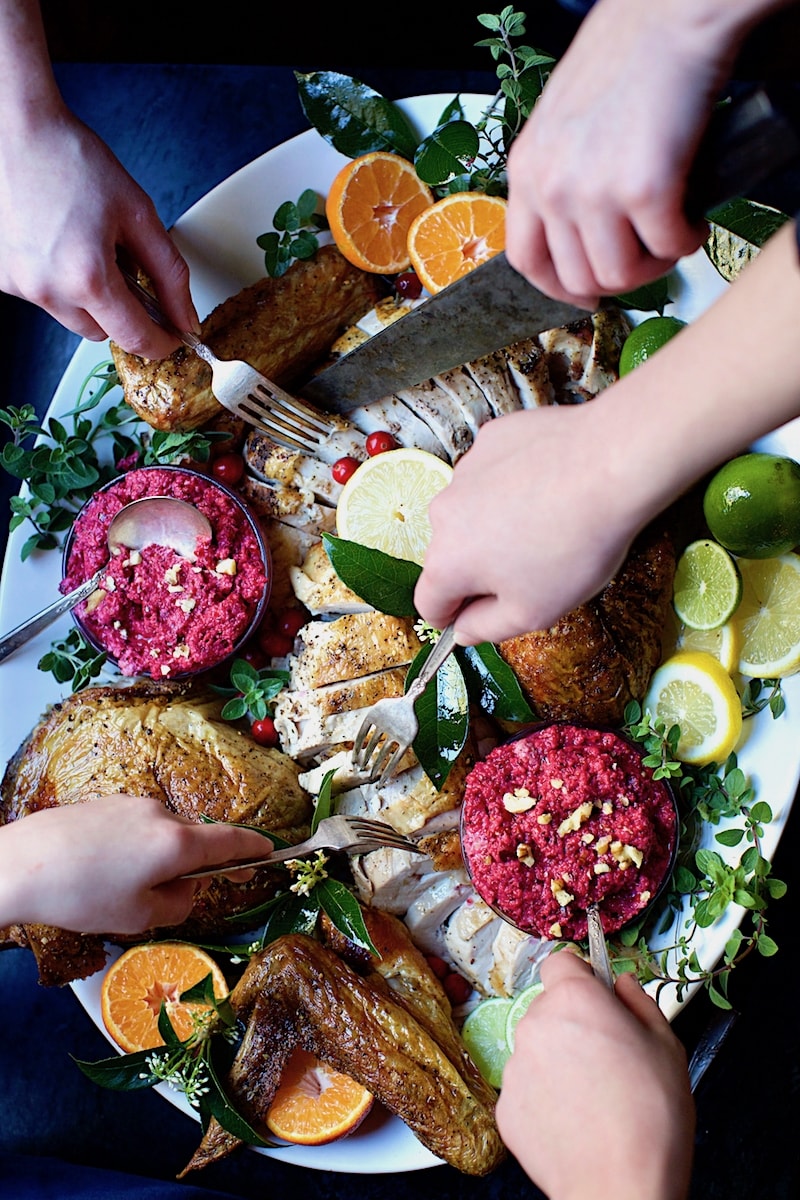
Brine and Cook a Turkey Perfectly Every Time
Brine and Cook a Turkey with Ease—Really!
“If it were only that simple,” you might be saying right about now. Cooking a whole turkey, whether wild or domestic, can seem like a daunting task. But trust me, with just a few steps, you can have a perfect turkey for your Thanksgiving meal or anytime.
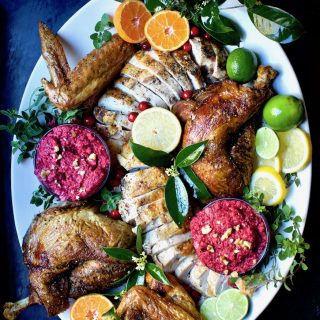
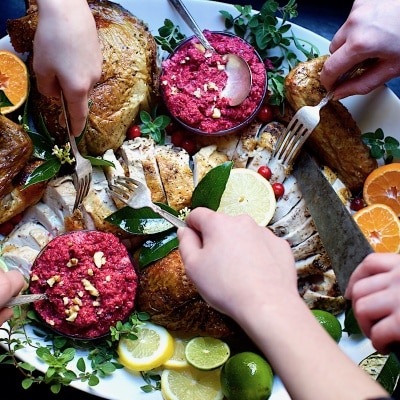
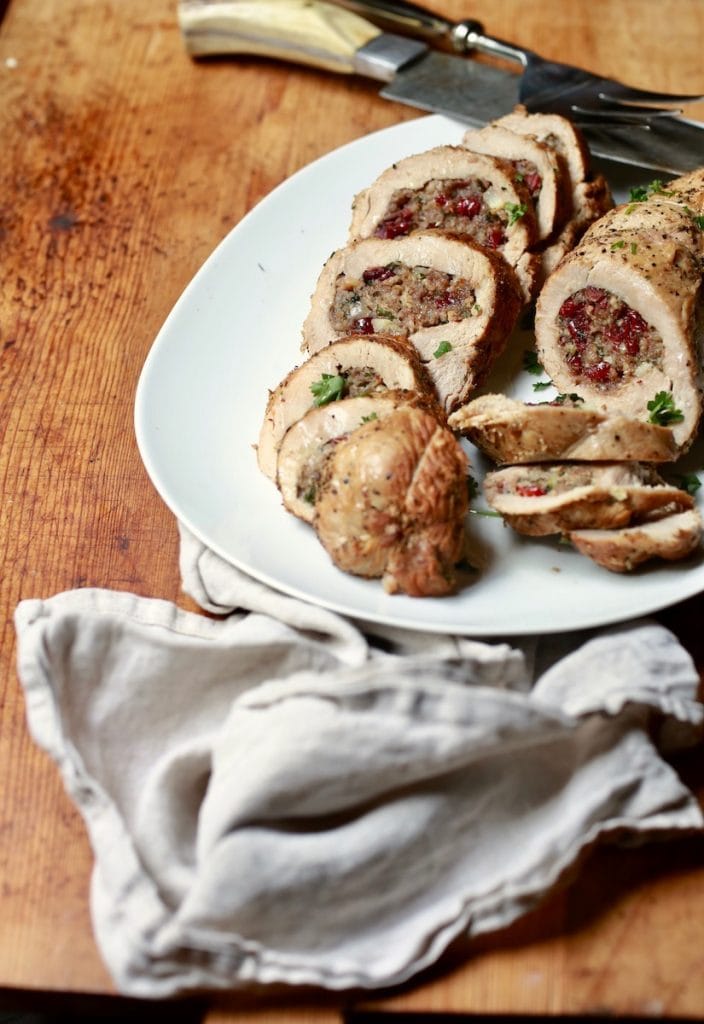
We all covet those beautiful turkeys we see people put on that festively decorated Thanksgiving or Christmas table. I can almost taste it: crispy skin with tender, flavorful meat. You can create a perfect turkey every time by following the steps below for your chosen method of cooking.
In this article I give step-by-step instructions and tips for:
- Wild vs. domesticated turkey
- Wet vs. dry brining and how to do each
- Spatchcocking the turkey for faster cooking
- Roasting a whole turkey
- Frying a turkey
- Smoking a turkey
These recipes and how-tos start from a thawed turkey. If you have a frozen turkey from the store, follow the instructions provided for thawing it in the fridge. I recommend cooking your stuffing or dressing separately.
Wild vs. Domesticated Turkey
If you are cooking a wild turkey, you will want to make sure it has aged properly. I prefer dry aging my meat before it is frozen. During dry aging, the meat needs to be surrounded by a constant air temperature of 34-37 degrees. This denatures (breaks down) the meat.
A domesticated turkey from the grocery store, on the other hand, is ready to cook. You can thaw the meat as per the instructions and then begin with a brine.
If you decide to spatchcock your bird (which I highly recommend), you can brine it either before or after you spatchcock.
- If I want to wet brine the turkey, I will spatchcock after brining.
- On the other hand, if I plan to dry brine, I will spatchcock the turkey before putting the dry rub on the bird.
How to Brine a Turkey: Two Methods
Brining ensures moisture will be retained in the meat during the cooking process. There are two types of brine; a wet brine and a dry brine. Salt is the key component to both.
Wet Brine a Turkey
A wet brine is simply a mixture of salt, water, and spices used to season and retain moisture in meats. Along with the salt, the water gets absorbed at the cellular level into the bird. This ensures a moist turkey on the table.
I enjoy a lightly flavored brine that enhances the turkey’s flavor, especially if cooking a wild turkey. In addition to salt, I find that acid assists in poultry prep by aiding in the breaking down of muscle fiber and connective tissue to further enhance tenderness and flavor. I also add sugar to balance the saltiness and sourness. To me, it’s a perfect balance.
Prepare the brine to your favorite flavor profile; just be sure to have at least an 8% salt to water by weight to ensure the retention of water during cooking.
Problem: Wet brining a whole turkey can prove troublesome because the bird has to stay completely submerged in the brining solution. You may not have enough room in your refrigerator to keep the turkey and brine cold for the entire brining process.

Solution: Place the brine in a trash bag inside a cooler. By periodically pouring ice into the bag, you can ensure that your turkey will remain at a safe temperature (between 35 and 40 degrees F).
Tip: To keep the brine from getting too diluted, you can wrap the bag around the turkey and pour ice over the bag.
Timing: I brine my turkey for 24 to 48 hours.
When you are ready to cook the turkey, remove it from the brine and then rinse and dry it very well.
Watch me demonstrate how to wet brine a turkey for the Outdoor Channel.

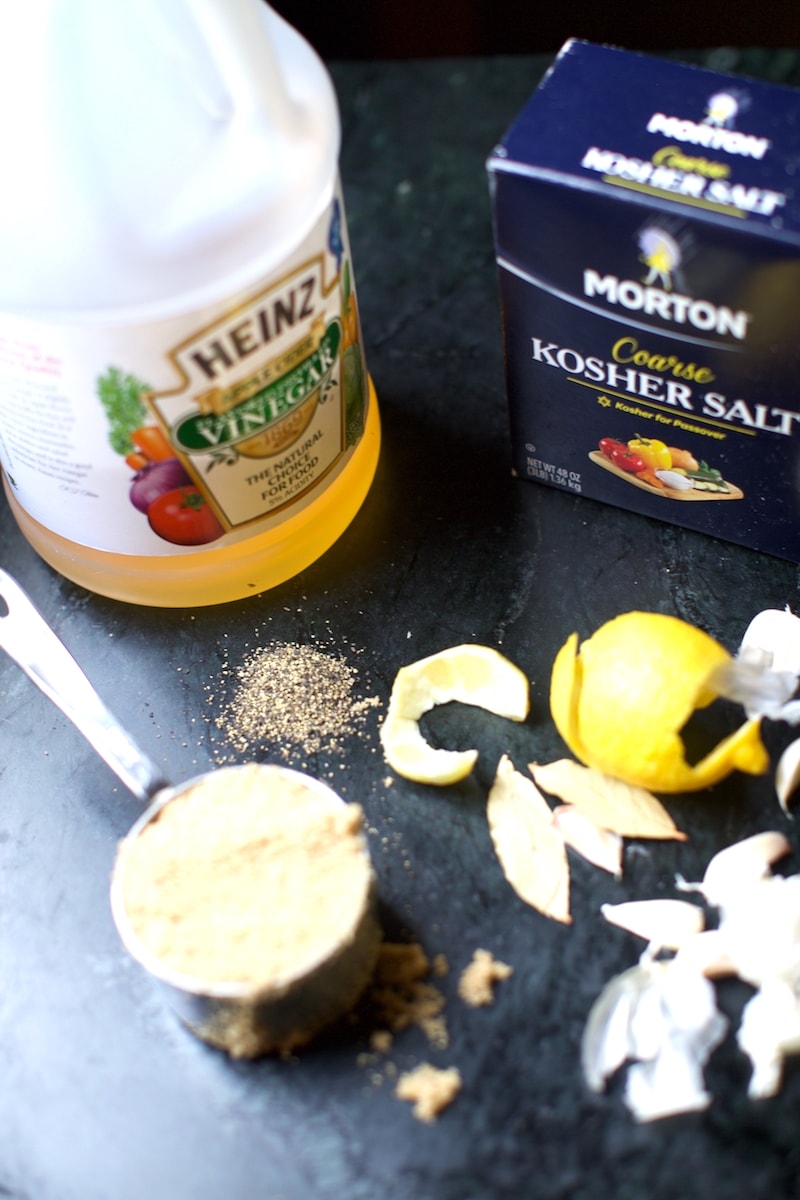
Turkey Wet Brine Recipe
Ingredients
- 1 gallon water
- 1 cup apple cider vinegar
- 1 cup brown sugar
- 1 cup salt
- 5 cloves garlic
- 3 bay leaves
- 1 tablespoon pepper
- peel of one lemon
Instructions
- In a large pot, bring water, apple cider vinegar, brown sugar, and salt to a boil. Once it reaches a boil, turn off the heat and stir until the sugar and salt are dissolved. Add the garlic cloves, bay leaves, pepper, and lemon peel. Allow mixture to cool completely. Add 4 cups of ice to the mixture.
- Place a large plastic trash bag inside a cooler. Put the clean, dry turkey inside the cooler and pour the brine over the turkey. Periodically check the temperature of the cooler. It should remain between 35 and 40 degrees F. Leave the turkey in the brine for 24 hours.
Close the bag around the turkey and pour ice over the bag to ensure a consistent right temperature.
Dry Brine a Turkey (Dry Rub)
I often use dry brines, especially with venison and beef, as detailed in my post Tenderizing Tough Cuts of Meat with the Best Dry Rub Recipe.
A dry brine works equally well with a turkey. A dry brine will help your turkey retain its natural moisture.
Problem: Tough cuts of meat are usually tough due to the connective tissue and muscle fiber in the meat of the animal.
Solution: Kosher salt breaks down the protein and improves the texture of the meat. How? It draws out the hydrogen while leaving oxygen in the muscles. As a result, lactic acid forms. The acid then breaks down the fibers in the muscles and connective tissue.
To use this method, combine salt and spices and rub vigorously into the meat. Refrigerate uncovered overnight to allow the spices to permeate flavor into the meat while tenderizing it.
Tip: Keeping the turkey uncovered will help dry the skin producing a much more crispy skin. My Favorite!
In the video below, I show you how to spatchcock, dry brine, and smoke a turkey:
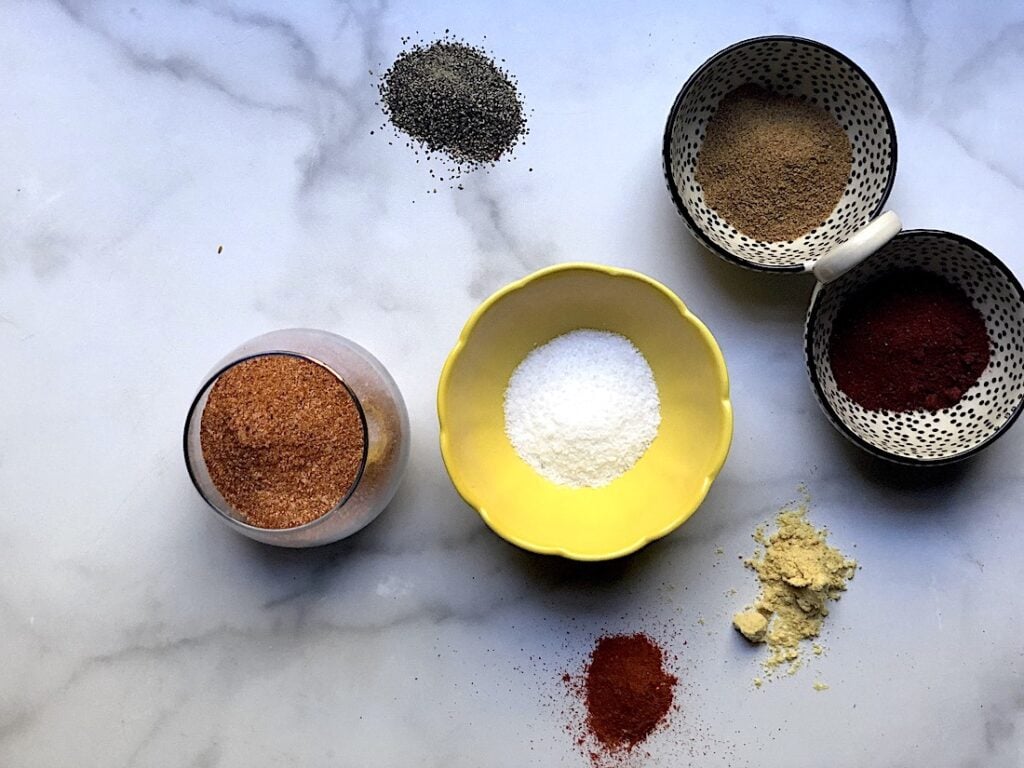
Turkey Dry Brine Recipe
Ingredients
- 1/2 cup Kosher salt
- 1/4 cup brown sugar
- 2 sprigs fresh rosemary minced
- 3 Tablespoons garlic powder
Instructions
- In a medium-sized bowl, mix salt, brown sugar, rosemary, and garlic powder until fully incorporated. Place turkey on a roasting rack inside a large roasting pan. Pat mixture all over the entire surface area of the turkey, inside and out. Chill in the refrigerator uncovered (air needs to surround the turkey) for 48 hours.
- About 1 hour before you will be cooking the turkey, remove turkey from refrigerator and rinse thoroughly. Pat turkey until completely dry. Allow to come to room temperature before you cook the bird. It will cook more evenly and more quickly.
- Your turkey has been brined and is now ready to fry, roast, or smoke!
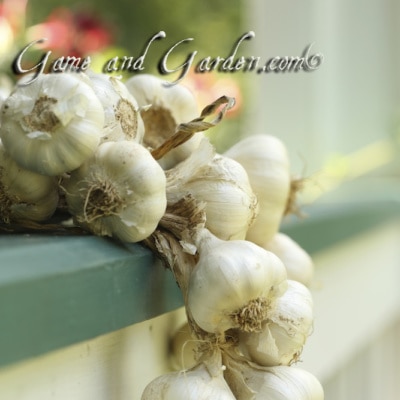
Fresh Garlic or Garlic Powder?
I’m a huge believer in using fresh garlic, but I make an exception for dry brines. I find that incorporating garlic powder with the other dry brining ingredients not only is convenient but tastes better. The garlic powder adds “just enough” flavor to the meat without overpowering it.
Slate.com states my exact sentiment with much more finesse: “but garlic powder acts like glue behind glitter, adding a subtle fullness of flavor that may be more difficult to detect, but nonetheless makes the meal taste better.”

Cooking the Turkey
Now you’re ready to cook your turkey! Whether you roast, smoke, or fry it, be sure to use a meat thermometer to test the internal temperature for doneness.
Roast Spatchcocked Turkey
Problem: Turkeys take such a long time to cook.
Solution: Spatchcocking is a way to get a turkey on the table fast.
Spatchcocking is really just a fancy term for removing the backbone from the bird before you roast it. Spatchcocked turkeys take less time to cook and also tend to cook more evenly than a whole roast turkey.
Other than when I fry a turkey whole, I prefer to spatchcock my turkey for more even cooking and crispier skin. If I wet brine the turkey, then I do the brining first. (You can reverse the steps if you’re doing a dry brine.)
Below is my Roast Spatchcocked Turkey Recipe.
Note: Don’t discard the backbone. It’s perfect for making a deep flavored broth!
Tip #1: Begin checking the turkey for doneness about 20 minutes after you reduce the temperature to 350 degrees. Check the temperature every 15 minutes ensuring you do not overcook the turkey.
Tip #2: Don’t forget to allow the turkey to rest for at least 30 minutes on a cutting board before cutting. During this resting time, carry-over cooking will occur and the juices will redistribute, making a juicy bird.
Roast Spatchcocked Turkey Recipe
Ingredients
- 1 whole fresh turkey 12 – 14 pounds
- 1/2 stick melted butter
- 1/4 cup olive oil
- 2 garlic cloves minced
- 2 Tablespoons Kosher salt
- 2 Tablespoon freshly ground pepper
- 2 teaspoon fresh rosemary minced
- 2 teaspoon fresh thyme chopped
Instructions
Spatchcocking Instructions
- With the breast-side down, cut the backbone out of the turkey with heavy-duty kitchen shears. Save the backbone for making stock for gravy.
- Remove the wishbone from the turkey.
- Turn the bird over and flatten by pressing the middle of the turkey with both hands to break the breast bone.
Roasting Instructions
- Preheat oven to 450 degrees.
- In a small bowl, combine melted butter, olive oil, garlic, salt, pepper, rosemary, and thyme and mix well.
- Rinse and dry the turkey including the inside of the turkey.
- Place turkey on a roasting rack inside the roasting pan or on rack on a sheet pan. Tuck the wingtips under the breast.
- Liberally rub butter mixture on the skin and the on the inside of the turkey reserving 1/4 cup for basting.
- Place turkey in 450 degree oven for 30 minutes, then reduce temperature to 350 degrees and baste with reserved butter mixture every 30 minutes.
- Roast the turkey until an instant-read thermometer inserted into the thickest part of thigh registers 165 degrees F., about 1 1/2 to 2 hours, depending on the size of your turkey and your oven.
- Remove turkey to a cutting board and allow to rest for at least 30 minutes before carving. Make gravy while you wait.
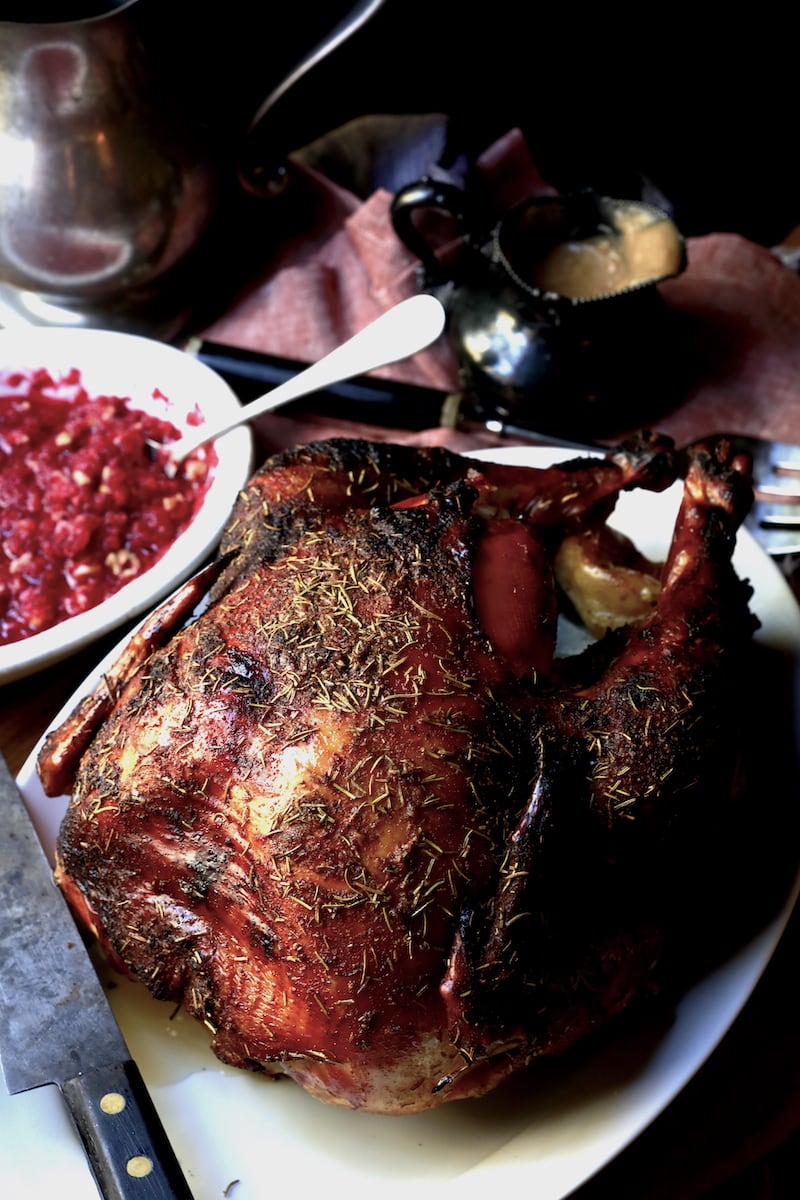
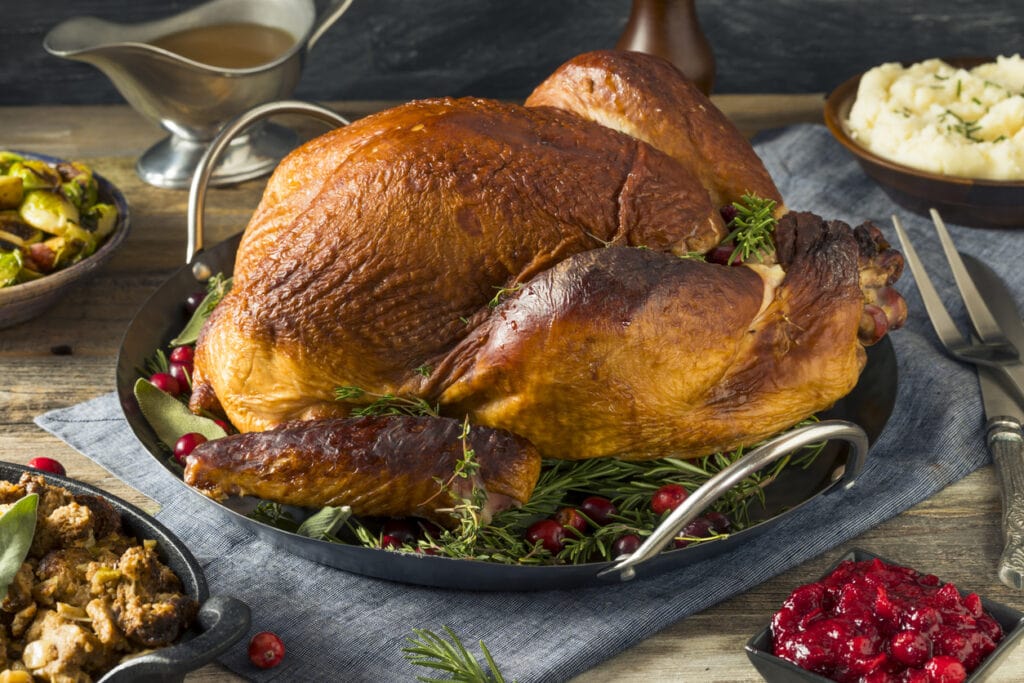
Roasting a Whole Turkey
I remember one year my mom made the best turkey I had ever had. I was 13 years old, and my Meme and Momsie were coming over. My mom took the roasted turkey out of the oven and I just had to get a pinch. It was the best pinch EVER!
The secret to that turkey was in the cooking method. She cooked on high heat for an hour or so then turned the oven off — yes, I said off — and in the morning, there was a gorgeous turkey waiting to be eaten.
Although I do not plan on cooking the turkey for 20 plus hours, I do use the technique of roasting at a high temperature for the first 45 minutes and then lowering the temperature to 350 degrees for the remainder of the cooking time.
See the recipe right below for steps and tips for roasting a whole turkey. Jump down further for tips on frying a turkey.
How to Roast a Turkey
Ingredients
Turkey Dry Rub
- 2 Tablespoons Kosher salt
- 1 Tablespoon freshly ground pepper
- 2 teaspoons fresh rosemary minced
- 2 teaspoons fresh thyme chopped
Turkey Basting Recipe
- 1 stick melted butter
- 1/4 cup olive oil
- 2 garlic cloves minced
Instructions
- Preheat oven to 450 degrees.
- Mix dry rub ingredients in a small bowl.
- Combine melted butter, olive oil, and garlic in a small bowl.
- Place turkey, breast side up, on a rack inside a roasting pan. Fill the bottom of the pan with about 1 cup of water to keep the drippings from burning the pan. Brush butter mixture over the entire turkey and inside the cavity of the turkey. Liberally massage turkey rub all over turkey. Reserve some of the butter mixture for basting during the cooking process.
- Roast turkey for 45 minutes or until skin is golden brown. Reduce oven temperature to 350 degrees and continue to roast turkey, basting with butter mixture every 30 minutes. After the second hour, begin checking the temperature of the turkey every 15 minutes to keep from overcooking.
- Remove turkey when an instant-read thermometer reaches 160 degree when thermometer is inserted into the thickest part of the breast. Allow the turkey to rest on a cutting board for at least 30 minutes to one hour for carry-over cooking and to allow the juices to redistribute.
Notes
SHORTCUT to Roasting a Turkey – Instead of brining the turkey, add all dry rub and basting ingredients together and rub the turkey inside and out. Place in the refrigerator uncovered for 24 to 48 hours. Remove from refrigerator and place in 425 degree oven for 45 minutes. Reduce the temperature to 350 degrees and continue to cook for another 30 minutes. With an internal thermometer, periodically check the temperature in the thickest part of the breast. When the temperature reaches 160 degrees, remove the turkey to a cutting board and allow to rest at least 30 minutes before carving.
Frying the Turkey
For many years, we have loved frying our turkey for the holidays. For one thing, it leaves me plenty of cooking space in the oven for the sides, which happen to be my favorite things. Another advantage is that the men love hanging out and frying the turkey for me, so there is one less item on my to-do list.
There are several culinary advantages to frying a turkey as well. For one thing, this method dramatically reduces cooking time. Take a look at the stats:
- Roasting a Spatchcocked Turkey: 8 to 10 minutes per pound on average
- Roasting a Whole Turkey: 20 minutes per pound on average
- Smoking a Turkey: 30 minutes per pound on average if temperature is around 120 degrees
- Frying a Whole Turkey: 3 to 5 minutes per pound on average
Along with reduced cooking time, super crispy skin and juicy, delicious meat will await you!
Though the advantages are many, there are a few challenges to frying a turkey. When I had young kids, I worried about the hot oil for safety reasons. Of course, adults using caution will have no problems. However, you may encounter the issue of an unevenly cooked bird.
Problem: If you don’t have the right amount of oil in the fryer, only some of your bird will get done.
Solution: As far as knowing how much oil to use, there is a simple trick that always works. Simply place the turkey inside a pot or bucket large enough to hold the turkey and fill with water over the turkey 3 inches. Then remove the turkey from the vessel and measure the amount of water left. Use this measurement to determine the amount of oil you will need for frying.
Brining the turkey always leaves me with a much better bird than those I don’t brine before frying. The meat tends to dry out more quickly when frying than when using other cooking methods, but not if brined and not overcooked.
It is best to use turkeys that are less than 12 pounds when frying.
Below are step-by-step instructions for frying a whole turkey.
Frying a Whole Turkey
Ingredients
- 4 to 5 gallons cooking oil peanut oil if no one has allergies to peanuts, for a 12 to 14 pound turkey in a 30 quart pot
- 1 12 to 14 pound turkey
- Turkey Dry Rub mixture of 2 Tbsp. Kosher salt, 1 Tbsp. pepper, 1 tsp. garlic powder, 2 tsp. thyme, 2 tsp. rosemary
Instructions
- Bring oil in the fryer to 375 degrees.
- Dry the brined turkey and cover with the dry rub, inside and out.
- Once the oil reaches 375 degrees, SLOWLY lower the turkey into the hot oil until fully submerged. This should take at least 5 minutes. The temperature of the oil will drop. Bring the temperature of the oil back up to 350 degrees and continue to cook at 350 degrees until the turkey is done, 40 to 50 minutes or when the instant-read thermometer inserted into the thickest part of the breast reaches 165 degrees.
Notes
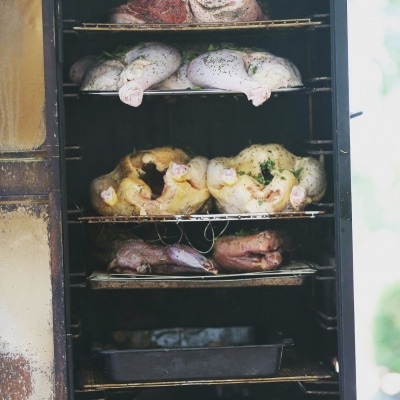
Smoking the Turkey
Smoking meat rocks! I can’t say it any more clearly than that. I thought my roasted chicken tasted just as good as smoked chicken, but my husband begged to differ. We had a cook-off to determine who as correct. Hands down, smoked meat has a flavor that just can’t be touched. Don’t get me wrong, I love roasted meat — but side-by-side, smoked flavor rules.
Smoking meat is one of life’s treats to me. I love to use my smoker and cook chicken, sausage, and pork butt all at one time. Then we feast throughout the week on the bounty.
Smoked turkey is just fabulous. You get tender, succulent, juicy meat with a crispy exterior packed with flavor. What’s not to love?

Perfect Smoked Turkey Recipe
For more tutorials and recipes like this one, check out my books HERE or on Amazon.
Perfect Smoked Turkey Recipe
Ingredients
- 1 turkey 12-14 pounds
- 1/4 cup butter melted
- 1/4 cup olive oil
- 3 tablespoons Kosher salt
- 1 tablespoon garlic powder
- 1 tablespoon freshly ground pepper
- 2 tablespoons smoked paprika
Instructions
- Rinse the turkey and dry thoroughly.
- Spatchcock the turkey for more even cooking.
- Place turkey breast side up on a sheet pan. Liberally rub butter-herb mixture completely over entire turkey. Refrigerate 24 to 48 hours uncovered.
- Remove turkey from the refrigerator and bring to room temperature while your grill or smoker is reaching 225 degrees.
- Oil the rungs of the rack to keep the bird from sticking.
- Bring either the grill or smoker to 225 degrees. Add several chunks of hickory or apple wood (they burn more slowly and won’t overtake the flavor of the turkey) to the smoker or on top of the charcoal if using a grill.
- Place turkey in the middle of a smoker or on the grill preheated to 225 degrees. Maintain temperature between 225 to 250 degrees during entire cooking process, 2 to 2 1/2 hours depending on the size of the bird. Account for 11-13 minutes per pound.
- Once the bird reaches 160 degrees, remove from the smoker and cover loosely with foil and allow to rest 30 minutes before carving.
Notes
– Happy Thanksgiving from Stacy Lyn!
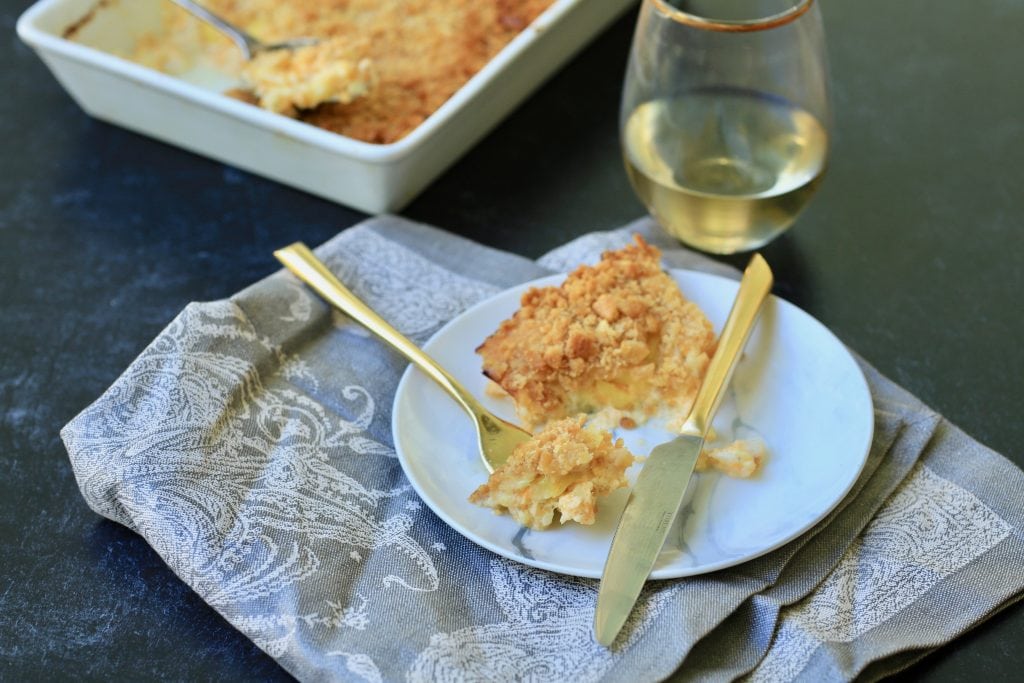
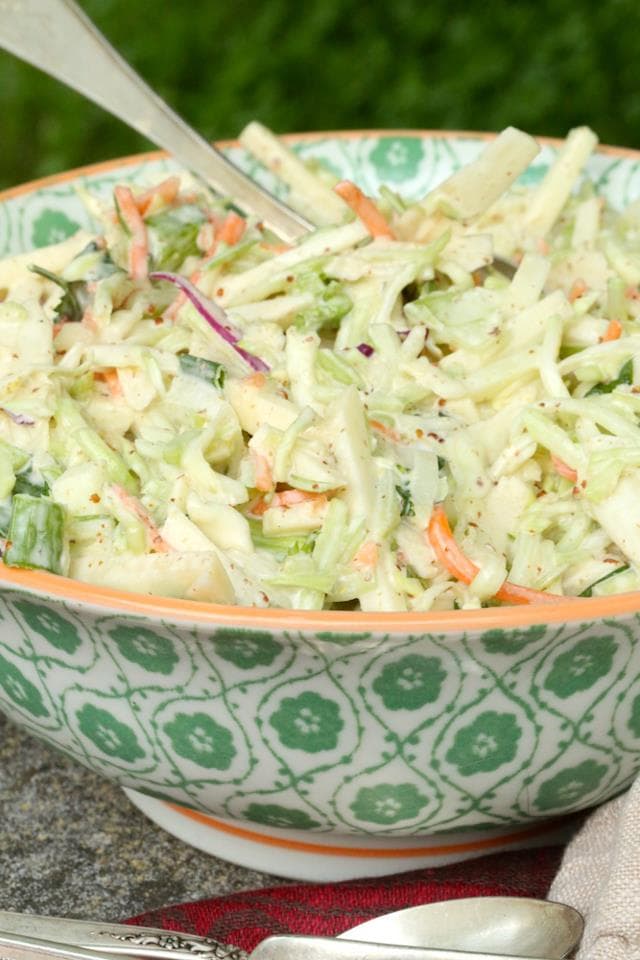
Here are more of my top holiday recipes.


Gorgeous photos and tons of info!!
Thank you so much, Stacey! (Love your first name, by the way.)
Thank you very much. From you this is a high honor! You are a great photographer!
Thank you so much !!! They all sound delicious my Mother died laughing the first time I cooked a turkey for my parents and friends, I cooked the turkey breast side down. But after they ate it she changed her mind and from then on she cooked hers breast side down, all the juices stayed in the breast.
Great tip!! I love it.
I know this may sound “mickey mouse” to some but if you’re using trash bags to brine your turkey, be sure to use unscented (some come lavender or lemon scented etc) un-treated bags.
I love that you gave this advice!! Thanks for the comment – not “Mickey Mouse” at all.
I usually buy a fresh turkey, but was concerned with waiting because of the poultry shortage rumors. I ended up buying a frozen Butterball. Can I still use your dry rub on this or brine it?
Absolutely you can Beverly. I do it all the tie with fresh turkeys.
Stacy – It’s a defrosted Butterball, not a fresh turkey. Would you brine or dry rub the Butterball?
Beverly, you can do either. Both ways will work. Personally, I would do a dry rub. Your turkey is going to be pretty moist anyway since it is a Butterball, so a dry rub is going to give you the flavor that you need, plus it will be very dry going into the oven, which will give you a nice crisp skin.
This is the ONLY way I will EVER cook a turkey…dry brined and spatchcocked. BEST turkey i have EVER made…and the EASIEST way also. And the fastest. I have never had such a succulent bird ~ white meat as well as dark meat! THANK YOU!
Kathy, I am so happy to hear that!! Thanks for making it!
This is the ONLY way I will EVER cook a turkey…dry brined and spatchcocked. BEST turkey i have EVER made…and the EASIEST way also. And the fastest. I have never had such a succulent bird ~ white meat as well as dark meat! THANK YOU! AND I DID NOT HAVE A BUTTERBALL…. just a generic turkey from work
Kathy, I could not be happier. When you find the right way to prepare a turkey, especially for a holiday, there’s nothing like it! It frees you up to do so many other things!! Glad the recipe helped!! Thanks for trying it.
Does roasting wet brined whole wild turkey on high temp at 500 degrees first work too, or will it dry it out?
Forgot to add, does cooking the turkey this way still end up with legs that are still tough or tougher than other meat parts?
The brine used on domesticated turkeys will yield moist legs. If wild turkey 500 degrees will not work for tender turkeys. I would braise wild turkey pieces. The wild turkey breast will work using the brining method.
Thanks for the reply! Not sure I completely understand. Will the brine used on domesticated turkeys yield moist legs for wild turkey too?
Yes!! I may have misunderstood your question. I would brine wild turkeys for 3 days. I would then braise the turkey very low heat for quite some time- like 8 hours for a wild turkey. Does that answer your question? The brine will work – just let it brine longer.
Yes! Thank you, that cleared it up!
Glad to help!!
I have been wet brining turkeys many ways for many years now and this is the best recipe I have ever used. The flavor is absolutely perfect on the skin and the flesh itself is wonderful! I have purchased your cookbooks and am an ardent follower. Thank you for sharing these inspiring recipes.