Cleaning and Cooking Collard Greens
Collard greens: how important are they in the South? In times past, cleaning and cooking collards marked a Southern girl’s transition from childhood to womanhood! My kids were helping harvest these healthy, tasty greens from the time they were little.

A Staple of the Southern Diet
Collards have been part of the Southern diet for centuries now. When I hear the word “collards,” I think of the days before mega marts. Back then, life was simpler, and every Southern family farmed the land to grow their food.
It is too bad that these wonderful greens are mostly just prepared at barbecue restaurants now. With a little motivation and a spot of fertile land (you don’t need a lot, maybe a 4’x8′ section) you can easily grow your own “mess of greens.”
Whether you grow or buy them, you don’t have to be Southern to enjoy the flavor and nutrition of Southern-style collard greens. Along with Hoppin’ John (black-eyed peas), they are essential New Year’s Day fare!
Are collard greens actually healthy?
In a word, yes! Collards are a cruciferous veggie like kale and broccoli, and they have many of the same health benefits.
Collard greens are loaded with Vitamin K, which is essential for health. It helps increase bone mass and may decrease the effects of Alzheimer’s disease by limiting neuronal damage. Other essential nutrients in collards are K, B-6 and C, calcium, iron, and magnesium.
Bonus: the fiber in these dark leafy greens can help lower blood pressure and cholesterol.
Growing Collards
The first step in growing collards is, of course, buying the seed. I plant the variety Green Glaze, an old heirloom from the 1820s, but other varieties such as Georgia Green are great as well. Plant the seeds 1/2 inch deep around 8 weeks before the first frost (Nov. 15 for central Alabama).
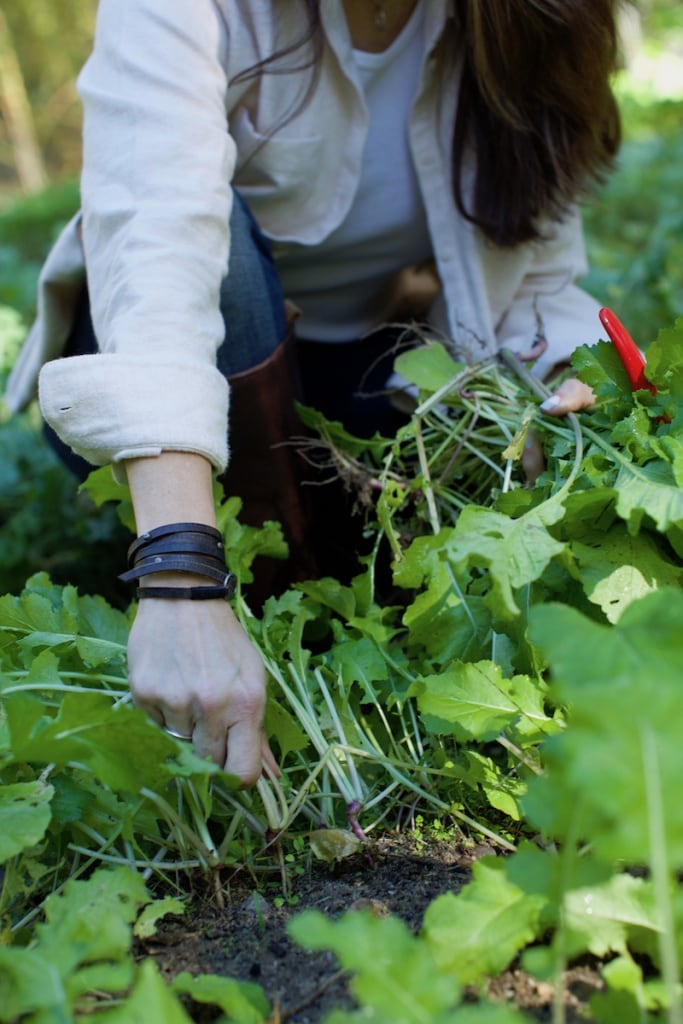
After the seedlings are about 4 weeks old, start thinning, spacing the collards first to about 4 inches, then to 6 inches. Don’t throw away the outcast; this can be your first harvest of collards.
After you thin, you can continue to harvest the collards by snapping off the larger outside leaves and allowing the head to continue to grow. Once you have your collards inside, you are ready to start the cleaning and cooking process.
How to Clean Your Collard Greens
Many people are scared to cook fresh collards for the hassle of having to wash away the dirt and grit. It’s easy when you know the secret, though!
When you prepare to cook your collards, the first step you need to take is not to reach for the spices, but for the sink. That goes for other dark leafy greens like kale and mustard greens, too. This is the hardest step, but is ABSOLUTELY NECESSARY, or you will be taking a visit to the dentist. The easiest way to do this is to fill up a large pot — the largest pot you have — with cold water and place the collards in the tub. Give them a stir and let them bathe for about a minute.
Now remove the collards, pour out the dirty water, and replace with new water. When you see that pile of sand at the bottom of the pot, you will be glad you took the trouble.
Repeat at least 2 more times or until the collards release no more sand.
Enjoy delicious, clean collards–-or any kind of greens, for that matter.

Hint: If you do not want to go through the cleaning process above, soak the entire bunch of leaves in salt water for about 30 minutes and then give the greens a good rinse in running water for about 3 minutes before cooking.
Cooking Your Collard Greens
Folks often fear the texture of the cooked collard greens will be mushy and grainy. I know, I’ve had them like that too many times. But it doesn’t have to be that way. If you’ve had cause to shun collards, I hope this recipe will change your mind about them!
Tonight I am cooking these collard greens probably for the fifth time!!!
This recipe is DELICIOUS!!!
—Jimmie
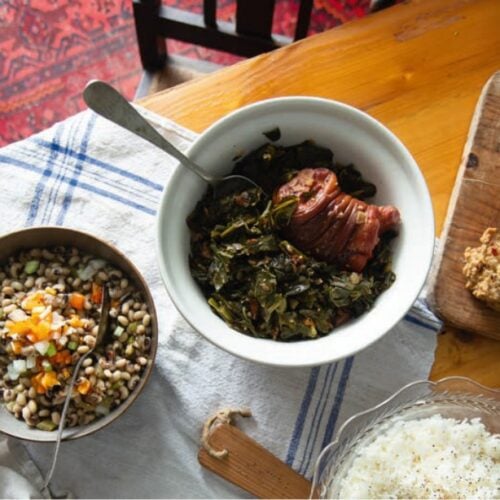
Like other Southern classics, collard greens are often simmered with ham hock or a ham bone to give the dish more flavor. Simmering the bone will also release collagen, which is tasty and important for health and beauty. However, both the ham and bacon are optional.
I love the classic version with pork, but I also prepare a simple, light version without it. I’m including both recipes below. Follow either recipe for delicious, nutritious collard greens. Season to taste with hot peppers or hot sauce, garlic or onion powder, or even soy sauce.
Get more Southern recipes in my cookbook Love Language of the South.

Simple Southern Collard Greens
Ingredients
- Olive oil
- 1 onion chopped
- 1 tablespoon garlic
- 2 pounds collards washed and pulled from the stem
- 2 cups dry white wine such as a Chardonnay
- 4 cups vegetable or chicken broth
- 1/4 teaspoon red pepper flakes
- 1 tablespoon kosher salt
- ¼ tablespoon freshly ground black pepper
Instructions
- Sweat the onions on the stovetop, cooking them in olive oil at low heat until they are translucent, about 5 minutes. Add garlic and continue to cook for 30 seconds longer.
- Placed washed collards into sauté pan. You may have to add half of the greens to the pan and let them shrink and then add the other half. Add wine, broth, red pepper flakes, salt, and pepper to the pan. Bring mixture to a boil at medium-high heat and then lower to simmer for 1 hour. Serve with Southern fried cornbread or jalapeño cornbread crumbled up in your tasty collard greens! Serve alongside black-eyed peas.
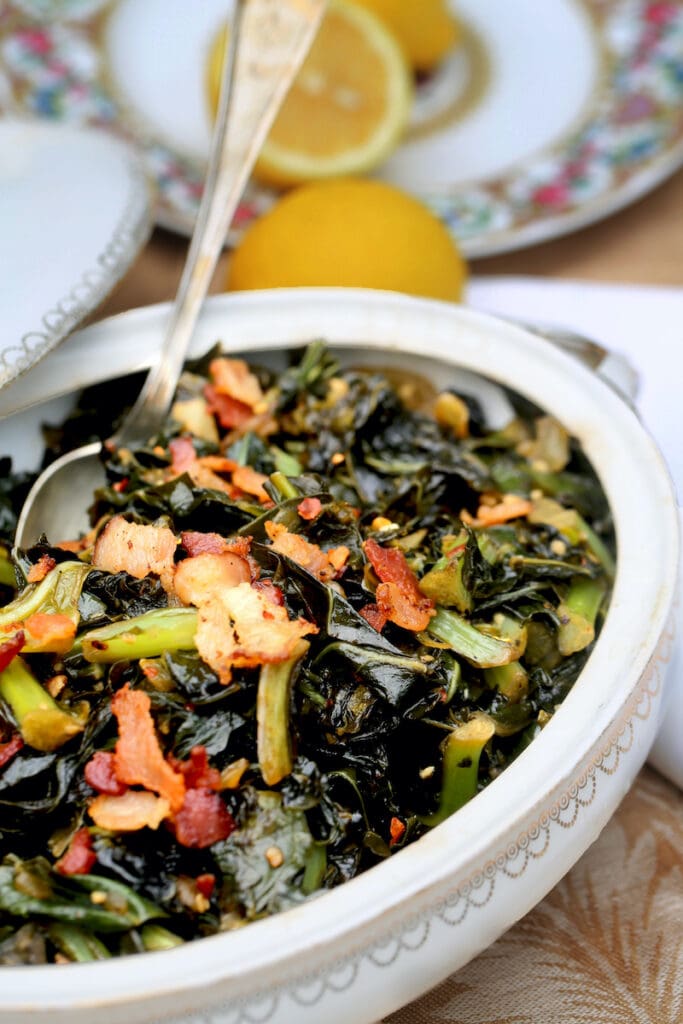
Southern Collard Greens with Bacon
Ingredients
- 8 ounces bacon finely chopped
- 1 onion chopped
- 1 tablespoon minced garlic
- 2 pounds collards stems removed
- 1 ham hock optional
- 2 cups dry white wine such as chardonnay or pinot grigio
- 4 cups chicken stock
- 1 tablespoon kosher salt
- 1 teaspoon freshly ground pepper
- ¼ teaspoon red pepper flakes
Instructions
- In a Dutch oven, cook the bacon over medium heat until crisp. Transfer the bacon to paper towels to drain; leave the fat in the pan.
- Add the onion to the fat in the pan and sauté until translucent, about 5 minutes. Add the garlic and cook for 30 seconds.
- Add half of the greens to the pot and let them shrink, then add the other half. Add the ham hock (if using), wine, stock, salt, black pepper, and red pepper flakes. Bring mixture to a boil at medium-high heat and then lower to simmer for 1 hour. Transfer the collards to a serving bowl and top with the bacon. Serve with hot water (fried) cornbread or jalapeño cornbread and black-eyed peas.


I can’t wait to try this recipe for collards. Thank you. Does it matter whether you use white or red wine? I really enjoy your site. Just found it a couple weeks ago.
I think that you will like this recipe. I think you could use either white or red. Let me know how yours turns out! Thanks for reading my site. I am so glad that you found it. Share it with your friends. Thanks for commenting!
After cleaning the collard greens, how should I store them in the refrigerator until use (a day or two)?
Should they be laid out and drained until dry?
Hi Diana! If you won’t need your collards for a few days, I would put my freshly washed collards into a salad spinner and get all water off of them and store them in a breathable container or bowl. They do need to be stored dry. I have heard of layering them in single layers between paper towels, but I don’t think that is necessary. To keep them breathable, I put mine in a bowl and lay a moist paper towel over the top of them. It keeps them really fresh for when you are ready to use them.
I love collards and want to try your recipe, however it’s unclear what kind of wine (or a good substitute) AND broth to use, that could definitely affect the taste.
I adjusted the recipe for you. Any dry white wine will work and I use chicken or vegetable stock, whichever I have on hand or in the freezer. I hope you enjoy the recipe!!
Hi Stacy. I have a few questions about collard leaves. I hope you can help me? I live in Virginia so, we get our collards from California. Sometimes there’s little tiny brown spots all over the leaves and areas that have really dark green lines maybe from creases? I’m trying to find out if those are still edible. Also, I forgot and left a bunch of collards soaking in a bowl of water overnight and now they smell is that bad? The main reason why I am asking is I need to know at what point should they not be given to my rabbits. Thanks, Nancy
Hi, A high quality video, both technically and for content. You are also fun to listen to: -) Congrats and thanks. I did not know collards need to be washed so much. Mine looked real clean but still had lots of grit. Is the “dirt” inside the stems?
Yes, Ron. The dirt is in the stems along with the outer leaves. Inevitably if I wash them any less I get grit. I am glad that you enjoyed the video.
I am wondering if it is okay to use the greens that have a mottled green yellow color or are those too old or bitter. l would love to see which leaves to throw away here on your website! l know to throw some away but not this type.
Teri, I usually have so many greens that I don’t use the ones that are discolored. They do taste a bit bitter to me, but if some make it in there it’s o.k. Hope that helps.
I’m trying your recipe for our Thanksgiving Dinner. Nothing like testing out a recipe for a gathering of 30! 😉 One thing I did differently since I was making such a large quantity and bought fresh collards was I washed them in my washing machine! I posted on fb asking if anyone had tried that and many said that their mothers and grandmothers did that. I tore mine from the stalks, put in a really large mesh lingerie bag, made sure it was sealed WELL and put it on the Hand Wash cycle for cold/cold. We will see how they turn out. I can’t tell if they are gritty or not, my hands are so rough from being in so much water the last 2 days. I did run an empty cycle first to make sure there was no fragrance in the washer.
That is so cool Tacy!! Did it work? This would make life with dirt a lot easier! Thanks for sharing that!
I cook collard greens in my instant pot for 15 to 20 minutes. They turn out wonderful.
I’ll have to try that some time!! I’ll bet it concentrates the flavor too!
Tonight I am cooking these collard greens probably for the fifth time!!! This recipe is DELICIOUS!!! I have Stacy Lynn’s cookbooks and all the recipes are great. I have cooked her sage buttermilk waffles and served fried chicken thighs with them (I don’t have rabbits). All her cookbooks are stellar and worth the money. She is my go to chef! Thank you Stacy Lynn!
This is awesome to hear!! Thank you so very much. Makes my day!